DW Argo: Contact Page
To have the Contact page as on our Demo site, please follow our instruction below:
Step 1 Install Contact Form 7 plugin
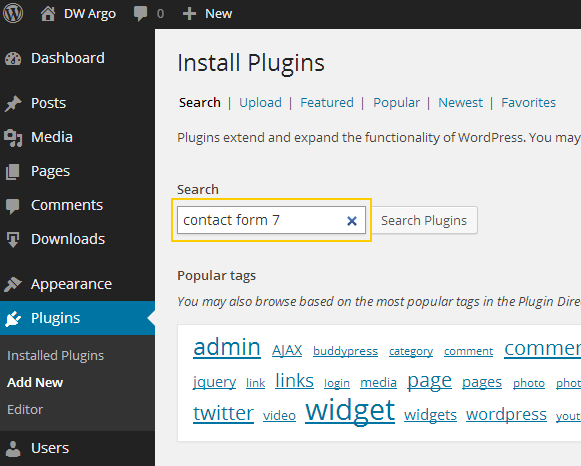
We are using the Contact Form 7 plugin to build the Contact page. That is reason why you need to install the plugin first. To archive this, just go to Dashboard >> Plugins >> Add New. In the Search box, type in Contact Form 7 as illustrated below:

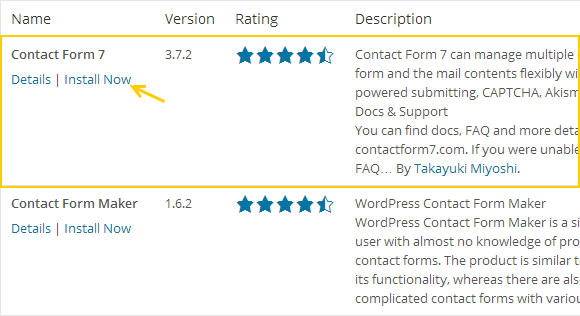
After searching, all results will be shown, please take note that, the plugin that we need to use is Contact Form 7 by Takayuki Miyoshi. Click on Install Now link to start installing.

Make sure that you Activate the plugin.
Step 2 Customize the contact form
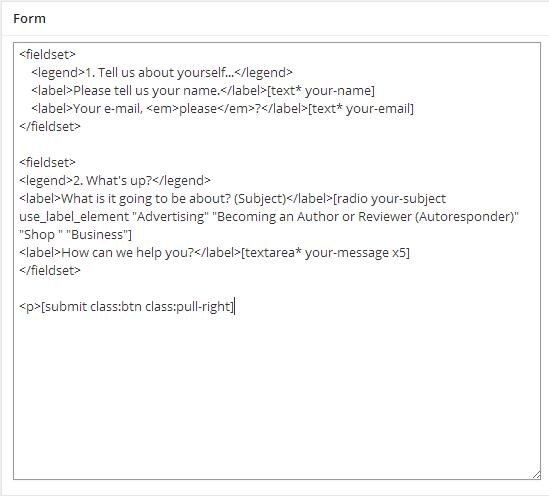
You can use the default form of the plugin however, it is not the same as on our demo. Here is the contact form element used in our demo, you go to Dashboard >> Contact, open up the Contact form 1 ( or add new contact form), copy the following code:
  <fieldset>
    <legend>1. Tell us about yourself...</legend>
    <label>Please tell us your name.</label>[text* your-name]
    <label>Your e-mail, <em>please</em>?</label>[text* your-email]
</fieldset>

<fieldset>
<legend>2. What's up?</legend>
<label>What is it going to be about? (Subject)</label>[radio your-subject use_label_element "Advertising" "Becoming an Author or Reviewer (Autoresponder)" "Shop " "Business"]
<label>How can we help you?</label>[textarea* your-message x5]
</fieldset>

<p>[submit class:btn class:pull-right]
Then paste it into the form editing field.

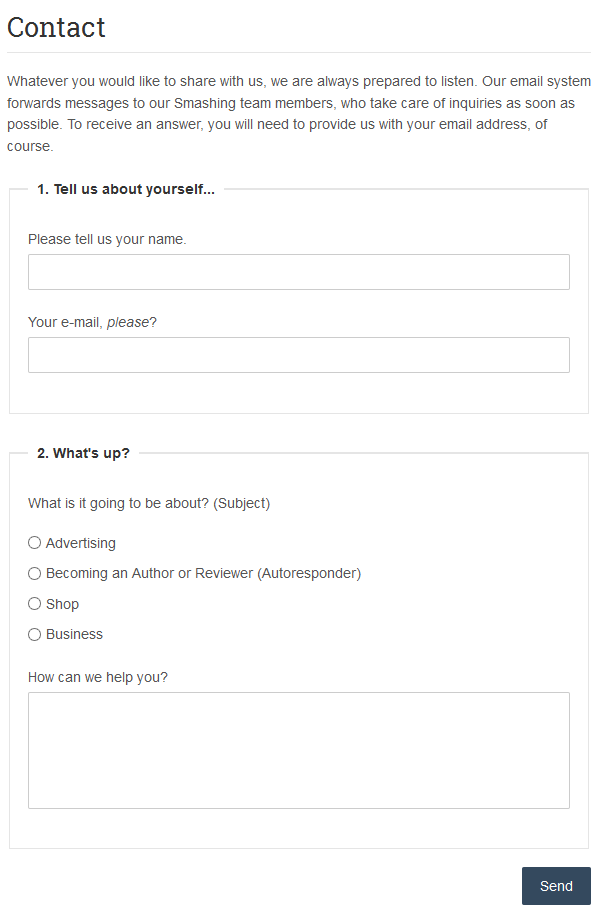
You can visit here for further details. Below is how it should look like in frontend:

