DW Focus 2: Build Demo Pages
This section will help you build default Theme page the same as DW Focus 2 demo site.
Firstly, you need to install the theme .Here is our instruction for how to install WordPress theme manually
Home page
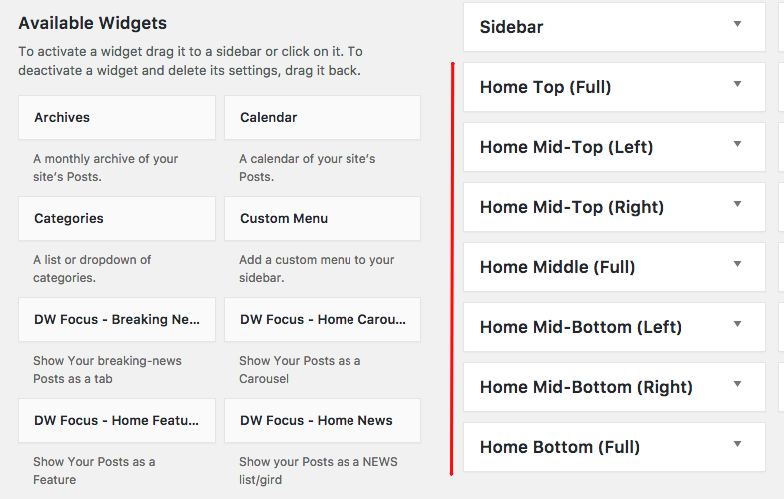
Here is the instruction to create the same Homepage:
Step 1 – Drag & Drop widget
DW Focus2 comes with Custom widget created specially for the theme. To set the Widget to go to Dashboard > Appearance > Widgets.
Included Sidebars & Widgets: Front-end of the Homepage
Step 2 – Configure widgets
After adding the widget to the Home sidebar position on the right-hand side You can configure the widget the same what you like. It’s very simple when you opening the widget.
The DW Focus 2 using the Text widget to insert the banner image to build the demo, if you want to add the banner to them theme, you can use the following code in the Text Widgets.

Header Section

Here is the instruction to create the same Header:
1. Header banner

You need to go to Dashboard > Appearance > Widgets then add the Text widget to the Header Over sidebar on the right-hand side then use the HTML in this step Step 2 – Configure widgets to insert your banner.

2. Header Topbar
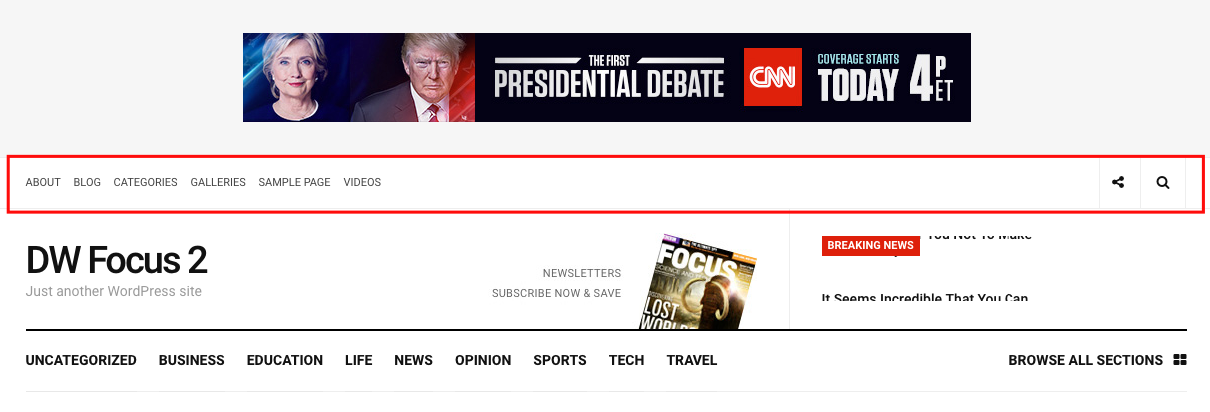
Topbar – Left
– To show the menu on the topbar, you can go to the Dashboard > Customize > Menus > Menu locations then select the Menu that you want to show on the topbar left.

Topbar – Right
– To show the Social, search box and Weather Fortcast on the right of the topbar, you can go to the Dashboard > Customize > Header Topbar > then open the each tabs to enable.

3. Logo & Header(Left-Right)

Add Logo
Go to Dashboard > Customize > Site Indentity Then upload your logo. Also, you can add the Site title, Tagline and Favicon in here.
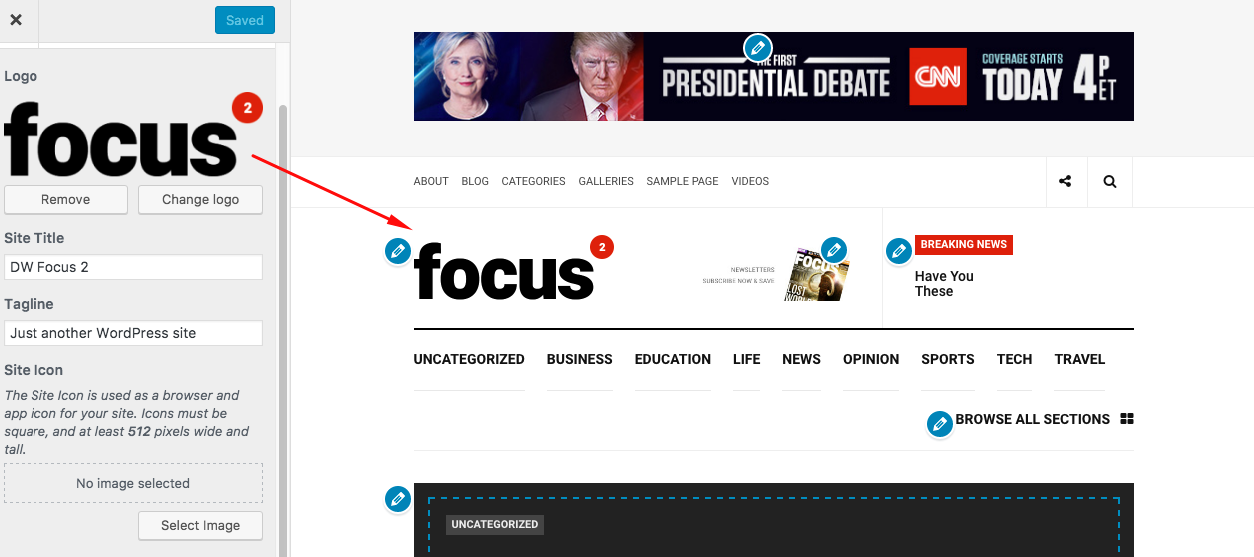
Header(Left-Right)
As you see on the demo on the right-hand of DW Focus2 logo, we have used the widget to insert the Newsletters image and BREAKING NEWS widget
Insert image
If you want to add 2 widgets, you can go to the Dashboard > Appearance > Widgets. Add the Text widget to the Header left and then use the HTML in this step Step 2 – Configure widgets to insert your banner.
Add Breaking News
To show the BREAKING NEWS, you can find the DW Focus: Breaking News widget in the Available Column and add this widget to the Header right sidebar.

Footer Section

Go to the Dashboard > Appearance > Widgets. Then add the widgets to the Footer 1 –> 4.
Footer 1 – Custom menu widget
You can add the custom menu widget to the footer 1 then select the menu that you want to show.
P/s: You need to create the menu in the Appearance > Menus then create the menus.
Footer 2,3
You can add the widgets that you want to display in this position. Just drag/drop widget.
Footer 4 – Text widget
You can add the following HTML code to show Subcribe form as our demo.

Also, you can use another plugins the same contact form 7 to create the forms then insert your shortcode here.
Page Sidebar
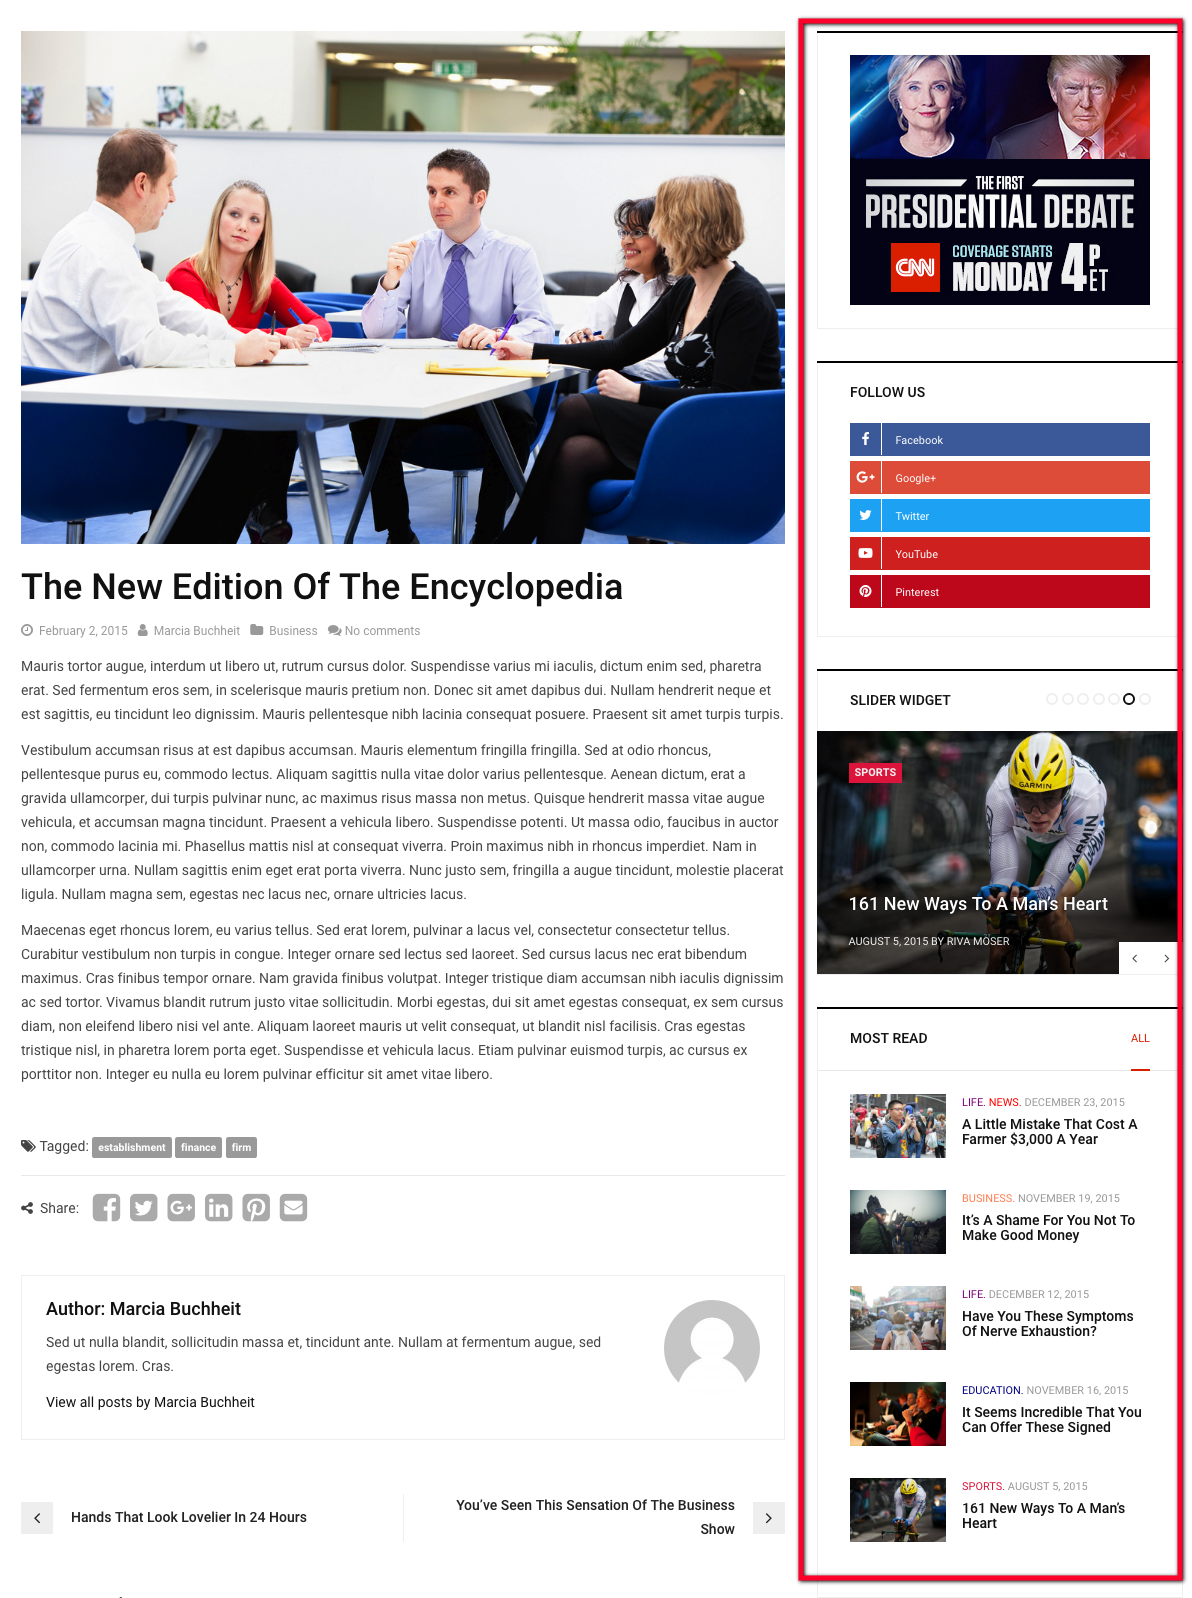
Go to the Dashboard > Appearance > Widgets. then add the widgets to the Sidebar box on the right-hand side then configure the widgets.

Main Menu

This is differently between DW Focus & DW Focus 2.
Currently, you can go to the Dashboard > Posts > categories > add new Then add the categories. If you want to show the submenu, you can create the sub-categories.
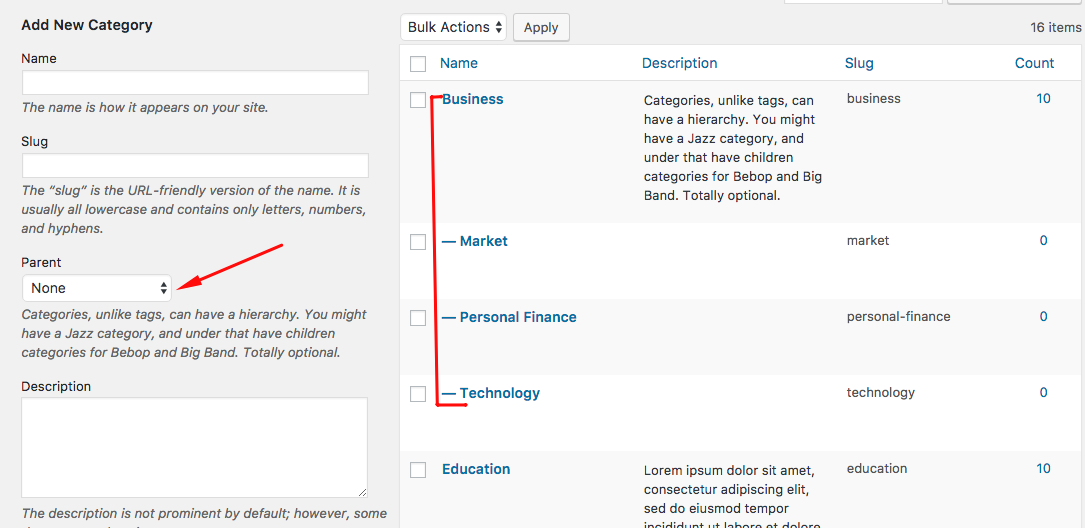
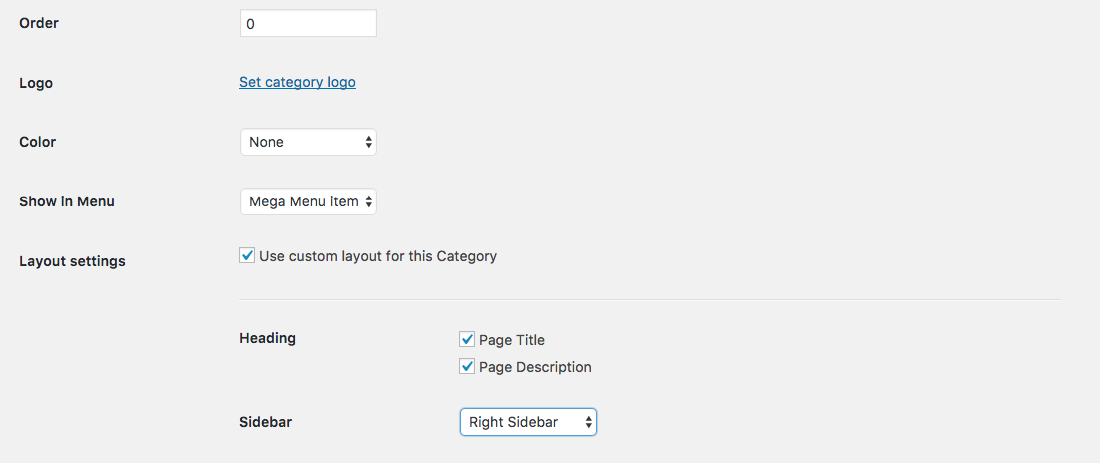
Also, you can edit the categories to configure the categories as you like. We have created some option for the categories:
Oder:
You can change the position of the categories(menu-item) to show on the main menu. Just needed insert the number to sort order the menu item.
Logo:
This option will allow you add a special logo for each categories.
Color:
You can select a base color for the special categories.
Show in Menu:
As our demo, you can see that menu showing with the mega menu type and if you want to display as mega menu, you can use this option.
Note: Select the mega menu item for all the parent categories not sub-categories.
Layout settings:
You can custom the cateogries page in this option with some options as enable/disable title, descreiption and change the sidebar.
