DW Jason: Custom menus
Step 1 Create a menu.
- Go to Appearance >> Menus
- Select Create a new menu at the top of the page
- Enter a name for your new menu in the Menu Name box
- Click the Create Menu button.

Step 2 Add Items to menu
You can add pages, categories and custom links to menu.
- Select Pages section >> tab “View All”
- Click checkbox to select items that you want to add to a menu.
- Click “Add to Menu” button and click the “Save Menu” button to save all settings.
See below screenshot:
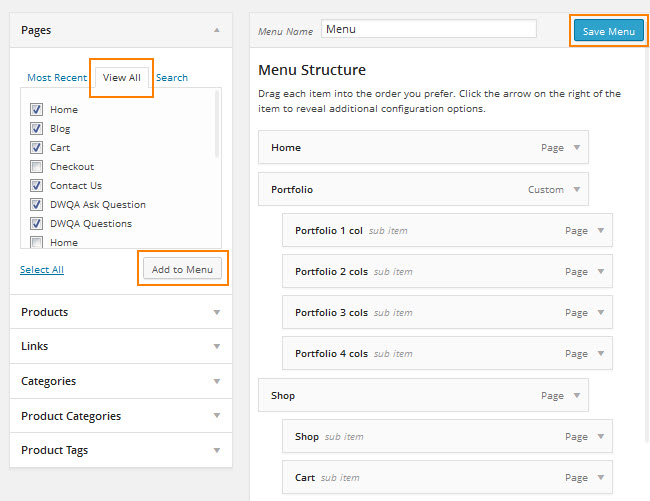
Note : You can change the order of menus and menus items and create multi-level menus by drag and drop the menu items. Drag menu items up or down to change their order of appearance in the menu. Drag menu items left or right in order to create sub-levels within your menu.
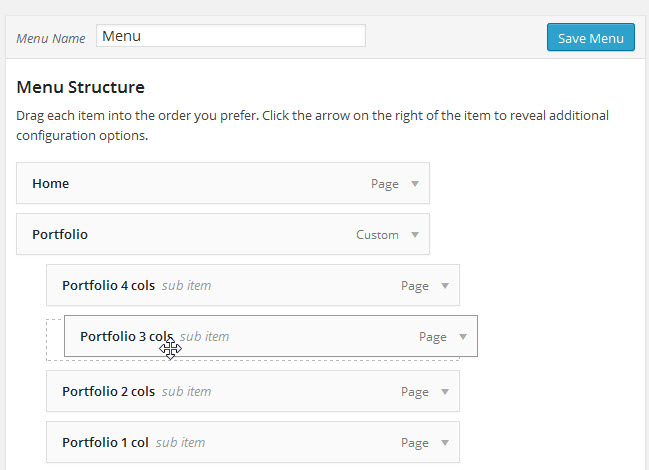
Here’s what it looks like on front-end:

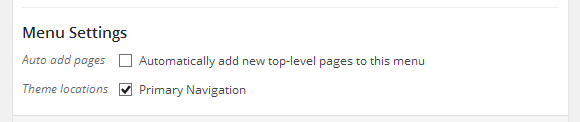
Step 3 Add menu to your site
- Auto add pages – If selected, new pages to be added automatically after creating them.
- Theme locations – Allows you to decide where you want your menu to display in your theme. In this case, please check this option. See below screenshot: