DW Timeline Pro: Primary Sidebar
In premium version, Sidebar becomes a part of DW Timeline Pro and it is ready in use. DW Timeline Pro supports only one Sidebar position – Primary Sidebar. In front-end, you can view by clicking the icon of the Sidebar at the top left corner of the screen.

To configure the sidebar, go to Dashboard >> Appearance >> Widgets >> Primary sidebar. You can select the widgets on the left column, then drag and drop them into the Primary sidebar as shown in the following screenshot:

DW Timeline: About Widget
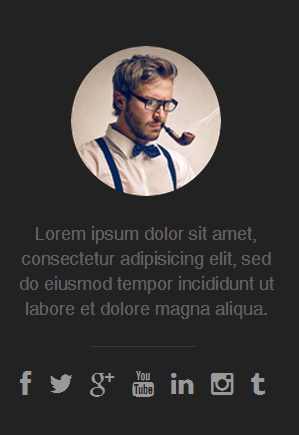
DW Timeline : About widget allows you to display a round avatar, a short description and media social links. Simply navigate to Dashboard >> Appearance >> Widgets, drag and drop DW Timeline: About widget into Primary sidebar. There are the settings of DW Timeline: About widget.

How the DW Timeline: About widget above looks like in front-end:
Besides the default Social Links above, you can insert other Social Links into the Other Links box. There are 2 ways you can do it:
1. Use the icons.
- Go to the icons link here to select the icon you would like to use.
- After choosing, copy Awesome icons with the
<i>tag. For example, the icon you wish to use is named “fa-linkedin”, you will copy as below:
<i class="fa fa-linkedin"></i>
- Insert the target link which you want to redirect if clicked as illustrated below:
<li><a href="your_link_here"><i class="fa fa-linked"></i></a></li>
2. Use the image
Simply copy the link of the image, then paste it into the Other Links box of the DW Timeline: About widget, then insert the link you want to redirect as shown in the following screenshow:

Custom Menu Widget
If you want to display a menu in the Primary Sidebar, you can use Custom Menu Widget.
Step 1 Before adding an item to a menu, you need to define a menu.
- Go to Admin panel >> Appearance >> Menus
- Select Create a new menu at the top of the page
- Enter a name for your new menu in the Menu Name box
- Click the Create Menu button.

Step 2 Add Items to menu
After defining a new menu, you need to add items to the menu. You can add pages, categories and custom links… to menu.
- Firstly, locate the items you want to add to menu by clicking the checkbox next to each item.
- Then hit the ” Add to Menu” button and click the “Save Menu” button to save all settings.
For example: To add the categories to the menu, you go to the pane titled Categories, then click on ” View All” link, select the categories you want to add the menu by clicking the checkbox next to each Category’s title.


Step 3 Go to Appearance >> Widgets >> Primary Sidebar.
Drag and drop Custom Menu widget on the left column to Primary Sidebar. After adding the Custom Menu widget to the sidebar, you need to enter the title and select the menu you want to show in front-end as shown below:

Here is what it looks like in front-end:

Step 1 Go to http://fontawesome.io/icons/
Select the icons you want to use and copy the icon name.
Step 2 Log in to Dashboard >> Appearance >> Menus. Choose the menu item you prefer, then click the arrow on the right of the item to bring up configuration options. Paste the icon name from Step 1 into Css Classes like the picture below:
If you don’t look at the Css Classes, go to Screen Options in the upper right corner of your Dashboard. Check ” Css Classes”.

Css Classes
Navigation Settings
Navigation tab is integrated in the Customizer section, it allows you to activate any custom menu which was created previously. Additionally, you can also switch the menu between the icon and text. To do this, just navigate to Dashboard >> Appearance >> Customize >> Navigation.
There are the settings of the Navigation tab.

If you want to display the menu, only pick a menu fromthe drop-down of the Primary Navigation, then select “Yes” under the item ” Enable Primary Navigation“. Once finalized, press “Save & Publish” button to apply all settings.

When the primary navigation is enabled, here is how it should look like:
