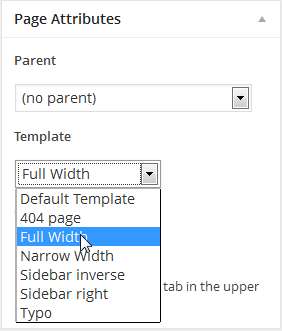
DW Trendy: Homepage Layout
1. Getting Started
Before building the Homepage layout, please install Page Builder by SiteOrigin.
Page Builder by SiteOrigin is a third party plugin. This plugin allows you make the interface of the page as intuitive as possible. Simply drag and drop the template builder and design options panel.
Go to Dashboard >> Plugins >> Add New and search Page Builder by SiteOrigin in order to install the plugin. After installing and activating successfully, you can build your own page as you want.
If you are new to this plugin, please read the Page Builder user guide here.
2. Homepage Slide
Step 1 Go to Dashboard >> Slides >> Add New
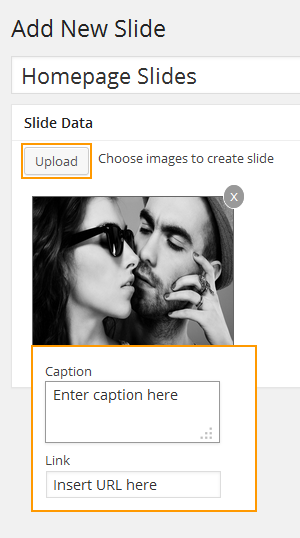
Click on Upload button to upload images.
If you want to insert caption and URL, after uploading the images successfully, click on the image which you want to use and start entering the caption and URL.
After that, hit ” Publish” button to save all settings.
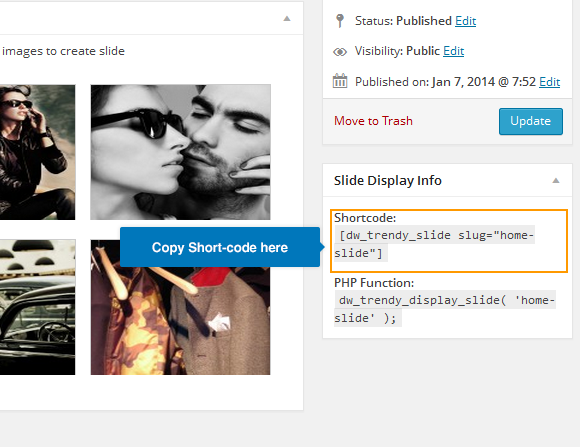
Step 2 Copy the shortcode of the slides which are created from Step 1
Step 3 Navigate to Pages >> Add New in order to create a new page named as “Home“.
Next, you go to the bottom half of your screen and start using the page builder to set up the homepage slide on the Home page.
Click on the add columns button (3 upright bars). This opens a modal and you choose 1 column in your new row.
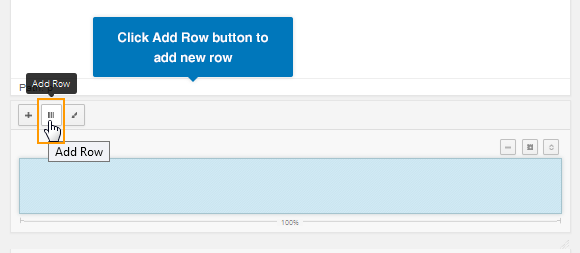
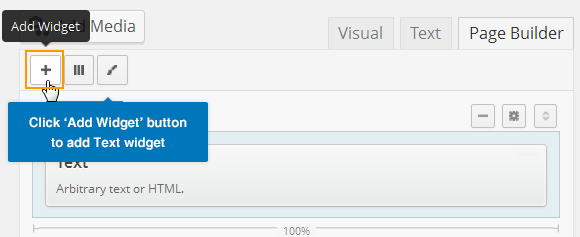
Then, click on the add widget button (plus icon) in the toolbar to to bring up the widget selection interface. You will choose “Text” widget

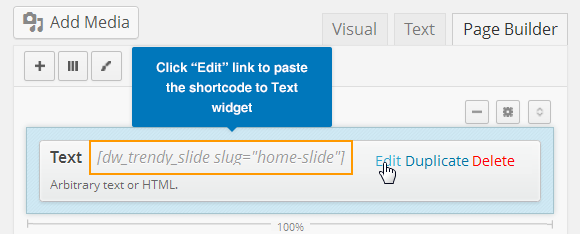
Paste the short-code from Step 2 into the Text Widget shown as below:
This is how the Homepage Slide should look like at the front-end.

2. Text Banner
Step 1 Click on the add columns button and you choose 3 columns in your new row.
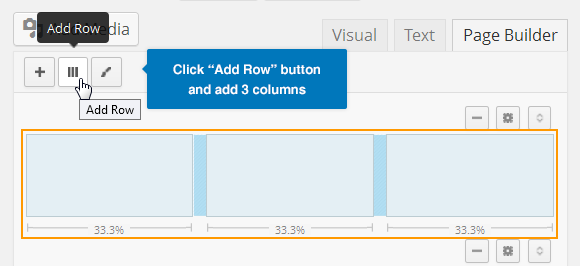
Step 2 Add 3 ” Text” widgets into 3 columns which have just created from Step 1. You can insert HTML code into Text widgets as you want.
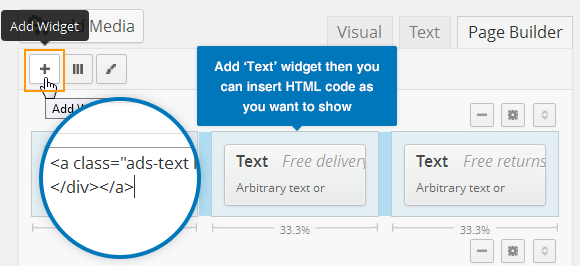
The demo shown below is set up for 3 different ads text:

Here is HTML code which we used:
Column1
<a class="ads-text light" href="#"><div><span>15% off</span> On every item over <span>$2,000</span></div></a>
Column 2
<a class="ads-text primary" href="#"><div>Free delivery worldwide</div></a>
Column 3
<a class="ads-text dark" href="#"><div>Free returns for <span>100 days</span></div></a>
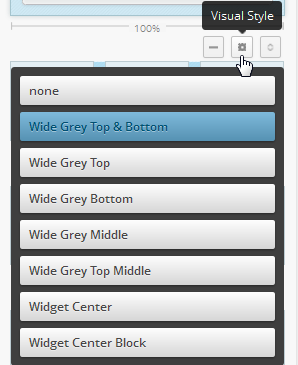
Step 4 You need to add row styles for this panel by clicking on “Visual Style” button on the tool bar and select ” Wide Grey Top & Bottom
Here are the settings of the panel:
4. Category Block
Step 1 Add 2 columns in your new row by clicking on the “Add Columns” button.
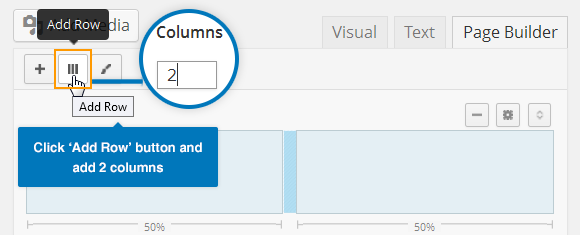
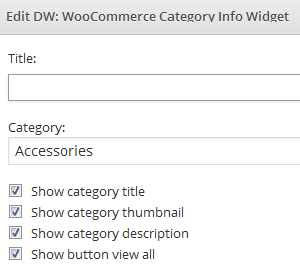
Step 2 Hit the “Add Widget” button (plus icon) in the toolbar and select DW: WooCommerce Category Info Widget widget. Here you enter the title, select category and check the boxes you want to display at front-end.
There are the settings of the widget:
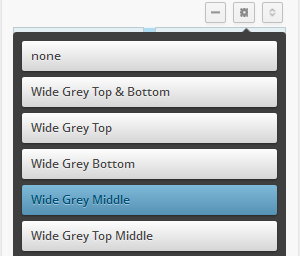
Step 3 To display a line in the middle, click on “Visual Style” button and select “ Wide Grey Middle” as shown in the following screenshot:
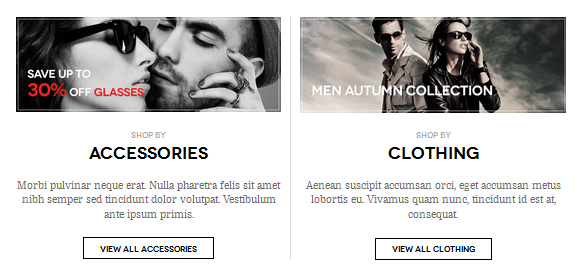
Look at the front-end and you will find it shown as below.
5. Ads Banner
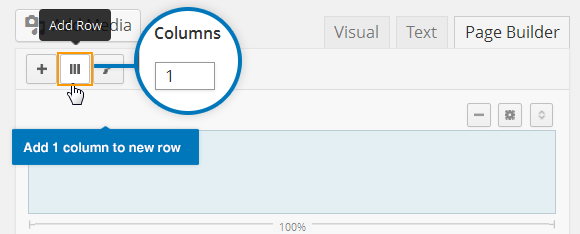
Step 1 Click on the “Add Columns” button and add 1 column in your new row.
Step 2 Press the “Add Widget” button and select Text widget. You can add HTML code into the Text widget as shown below:
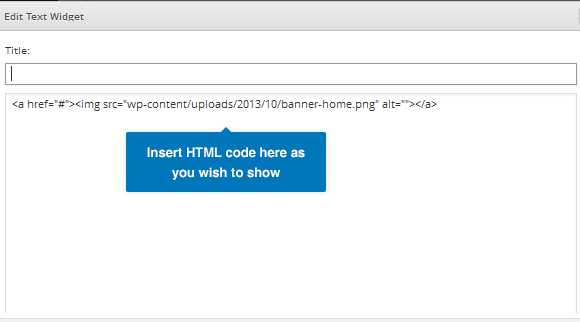
Here is HTML code which is used in the Text widget. Copy/paste and replace our image source with yours.
<a href="#"><img src="wp-content/uploads/2013/10/banner-home.png" alt=""></a
This is how the ads banner should look like at front-end:

6. Products Slide
Step 1 Click on the “Add Columns” button and add 1 column in your new row.

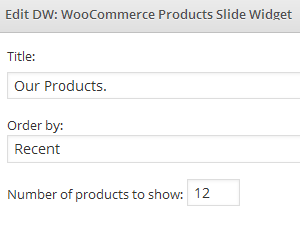
Step 2 Press the “Add Widget” button (plus icon) in the toolbar and select DW: WooCommerce Products Slide Widget widget.
There are the settings of the widget:
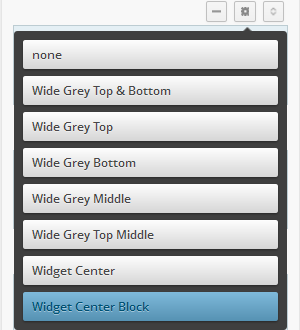
Step 3 To display products slide properly, hit “Visual Style” button and select “Widget Center Block” .
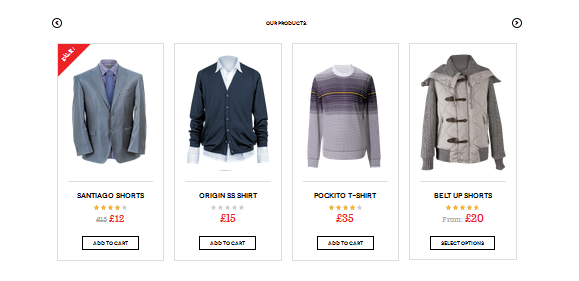
Here is front-end appearance.
7. Twitter Block
Step 1 Add 2 columns in your new row by clicking on the “Add Columns” button.
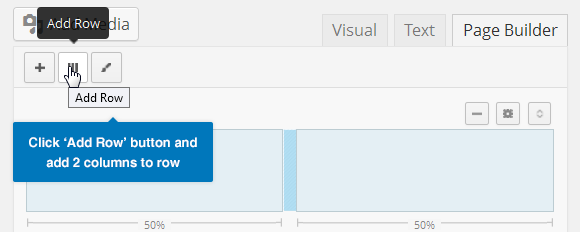
Step 2 Click the “Add Widget” button (plus icon) in the toolbar and select Text widget. Also, we use DW Twitter plugin in this panel.
There are the settings of the widgets:

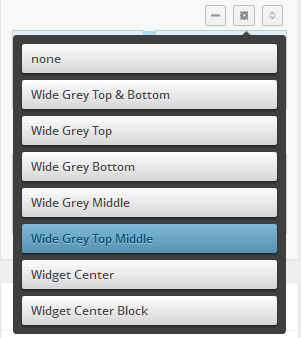
Step 3 Navigate to “Visual Style” button and select “ Wide Grey Top Middle” as shown below:
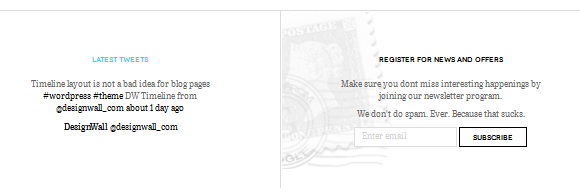
This is front-end appearance:
8. Clients Block
Step 1 Click on the “Add Columns” button and add 1 column in your new row.

Step 2 Add “Text” widget to the row.
If you want to display like our demo site, please copy/paste the following HTML code into Text widget.
  <h3><span>Brands for every style. Find yours.</span></h3>
<ul>
              <li>
                <a href="#"><img src="wp-content/uploads/2013/10/clarks.png" alt=""></a>
              </li>
              <li>
                <a href="#"><img src="wp-content/uploads/2013/10/dkny.png" alt=""></a>
              </li>
              <li>
                <a href="#"><img src="wp-content/uploads/2013/10/puma.png" alt=""></a>
              </li>
              <li>
                <a href="#"><img src="wp-content/uploads/2013/10/sloggi.png" alt=""></a>
              </li>
</ul>
Please replace our images with your images and insert URL with yours.
This is how the clients block should look like in front-end:

