DW Page: Custom Menu for Onepage
1. How To Setup A New Menu
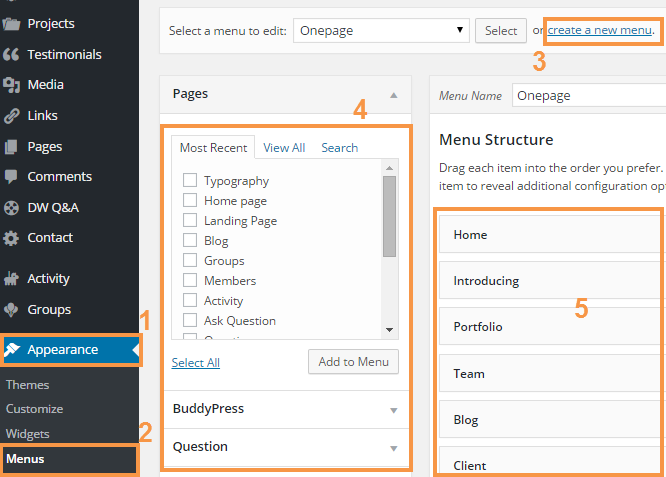
Step 1 Navigate to Dashboard >>Appearance >> Menus.
Step 2 Hit the Create A New Menu link to make a new menu. Enter the name then press the Create Menu button.
Step 3 To add a menu item, select one of your created pages, categories on the left hand side and click the Add to Menu button.
Step 4 For a custom menu item, enter a custom name and link into the Links box.
Step 5 Arrange your menus by using the drag and drop menu items.
Step 6 After setting up your menu, scroll down to the bottom of the page to assign the menu to one of the 4 locations in the Theme Locations box.
Step 7 Once its all done, make sure you click the Save button.
2. How To Create A Custom Menu For The Onepage Home
Step 1 Go to Dashboard >>Appearance > Menus then find & click on Create A New Menu link, input a name for the menu.
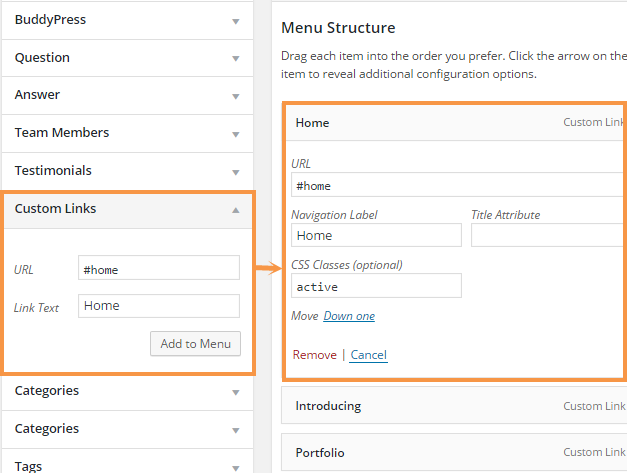
Step 2 Add Custom link on the left side to the menu
Please note that each menu item needs a unique anchor name in the URL field. They will link to the corresponding anchor name in your page content. For example, #home and then assign a name to the menu item. One done, press the Add to Menu button.
IMPORTANT NOTE: To the menu work properly, you must to enter anchor name properly with each section
#home for Home section

#introducing for Introduction section

#portfolio for Portfolio section

#team for Team section

#blog for Blog section

#testimonials for Clients section

#contact for Contact section
Step 3 Continue to repeat Step 2 for each menu item, please note that you must give each a unique #name.
Step 4 Once done, be sure to click the Save button.