DW Fixel: Homepage Layout
We have built DW Fixel with a special homepage layout to help you share your social content ( Google plus, Facebook, Twitter, Flickr and Instagram ), we named it as SocialWall. You can find this page template under Page Attributes when you create/edit a page.
Before starting, let’s take a look at the Homepage Layout at front-end and see how it is structured.

To do that, log in to Dashboard >> Pages >> Add New, enter the page’s title. Be sure to select Page Template as “Social Wall”. Take a look at the screenshot below for further checking.

After that, go to Social Wall Settings frame at the bottom haft of the screen and configure the Welcome box and Social boxes.
1. Welcome Box
Welcome box allows you to display the short content as shown in our demo site.
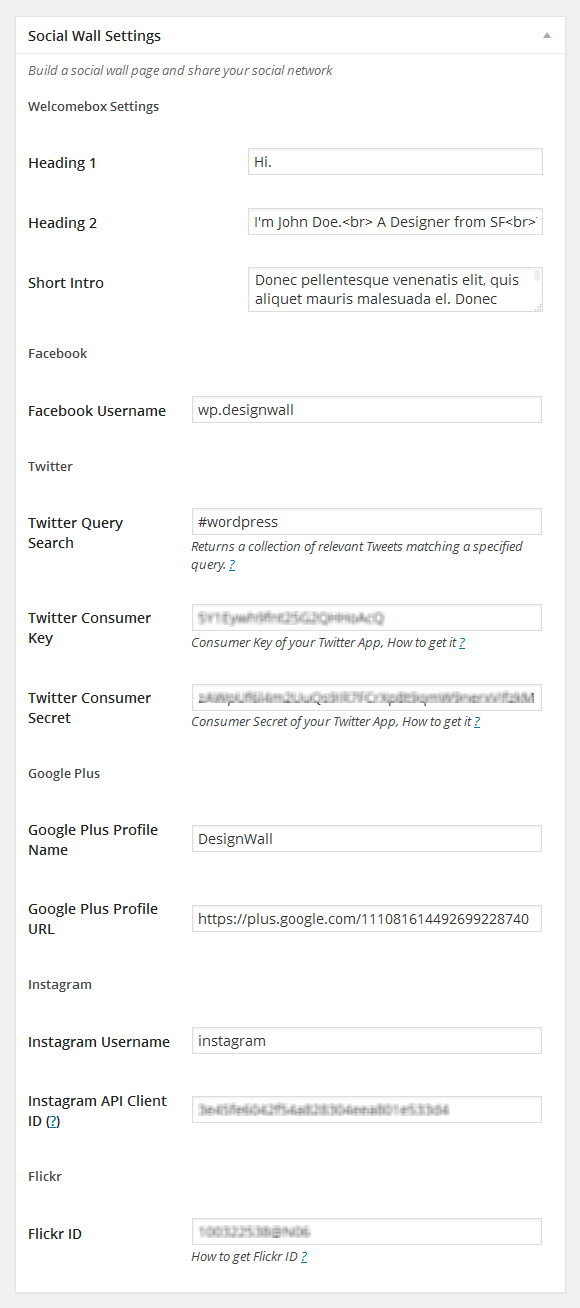
Here are the settings of the Welcome box in back-end:

This is how the welcome box should look like at front-end:

2. Social Boxes
DW Fixel comes with a set of settings for social sites in back-end. So, this responsive WordPress theme is a great combination of your profile and social network sites. Here are social channels which DW Fixel supports:
- Flickr, Instagram, Dribbble: Display images as Gallery or Single Image post format
- YouTube, Vimeo: Display video as Video post format
- SoundCloud: Display audio as Audio post format
- Facebook: Display Like/Follow button
- Twitter: Display your Tweets and Follow button
- Google+: Display Follow button
Here are the settings of the social network sites.
2.1 Facebook
Just go to your Facebook, copy/paste your Facebook username into Facebook Username box.
For example: your Facebook page address is http://www.facebook.com/wp.designwall
The setting will look like this:

2.2 Twitter
To get Twitter Consumer Key and Twitter Consumer Secret, please follow the instruction below:
Step 1 Go to Twitter Developer and create a new application (if you don’t have any yet) at https://dev.twitter.com/apps/new. Once you have your own app, you will have Twitter Consumer Key and Consumer Secret at OAuth Settings.

Step 2 Input your Twitter app’s Consumer Key & Consumer Secret. Remember that you entered Twitter Query Search.

2.3 Google Plus

2.4 Instagram
1. Firstly, make sure that you have already logged into Instagram account at http://instagram.com/developer/.
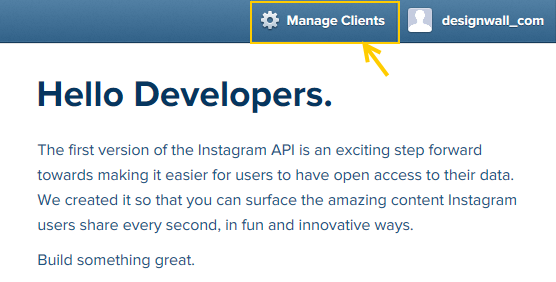
2. Click on Manage Clients link at the top right hand corner as shown below:
Please note that in case this is the first you get Instagram “Client ID”, the Instagram will ask you a few questions. After answering, click Sign Up” button, then you start clicking on ” Manage Clients”.
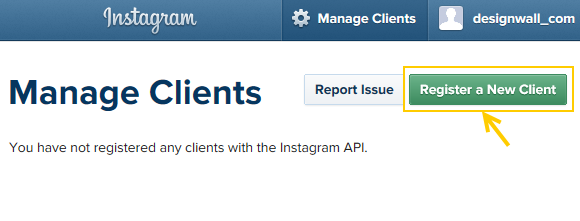
3. Now, click on Register a New Client button to register your WordPress website. You will be redirected to the page, in which you can create the App.
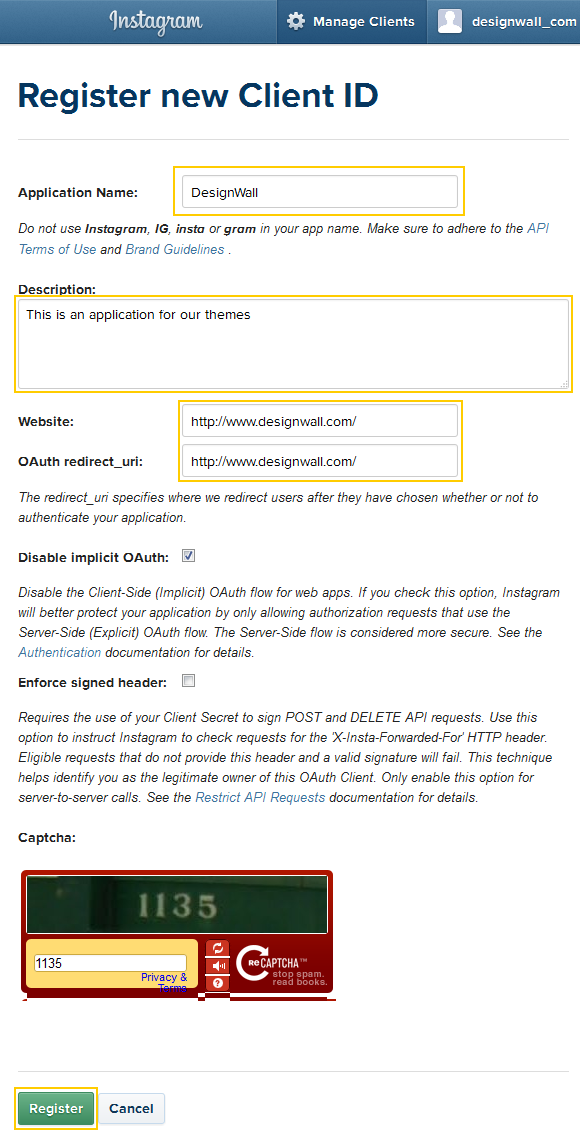
4. Fill out any required fields.
Application name: Name of your website.
Description: A short description of your app.
Website: Your site URL.
OAuth redirect_url: Redirect to your site URL which is using this API ( using DW Fixel theme for your site )
Once done, you will be redirected to your apps page, you can see there client info. Now just copy/paste to apply for your site. However, please note that you need to create different clients for each site on separate domain.
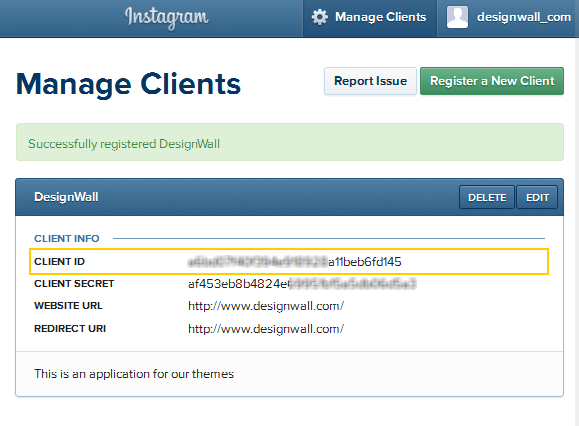
5. Log into Dashboard >> Pages >> Social Wall Homepage, scroll down and go to the Instagram section to enter your Instagram client ID that you have just done above.
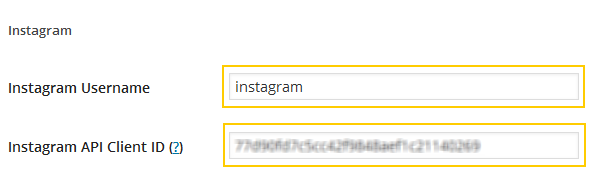
InInstagram Usernamebox, you don’t need to use “@” before your username, just your Instagram username. That’s all. Press ” Update” button to save all settings. Go to front-end to see how that works
2.5 Flickr
Enter your Flickr ID into Flickr ID box, all images in your Photostream will be shown as Gallery at the front-end.

You can find your Flickr ID as follows:
Step 1 Log in to Flickr account at http://flickr.com
Step 2 Click the You link to your photostream

If your Flickr address displays as your username, the easiest way to find your Flickr ID is to use the third party web service idGettr
Just go to http://idgettr.com, paste your Flickr address , hit “Find” button to have the Flickr ID.

Setting The Homepage
After creating the Homepage with page template as Social Wall, you need to set up the Homepage. This makes your site display properly as our Demo site.
