DW Timeline Pro: Customize Section
So far, this section is no longer new to all users of the WordPress themes. Timeline Customize section allows site admin to pick up the theme’s settings and preview those changes in real time without returing the front end to refresh the page.
To customize the theme, go to Admin Panel >> Appearance >> Customize, make sure that you pick correct theme and start adjusting as you want.
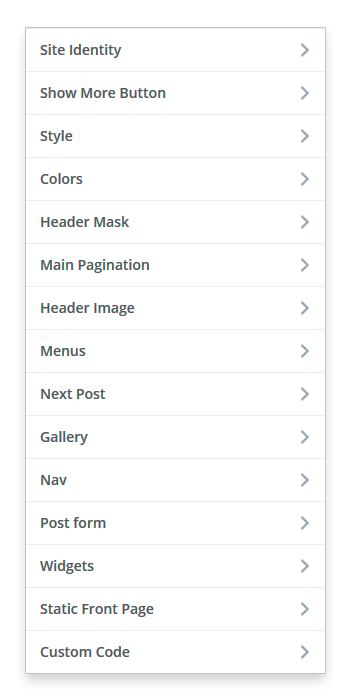
Compare to the free WordPress DW Timeline, the DW Timeline Pro theme has a lot of new functions. Below is a list of sections which are available in the Customize:
- Site Title & Tagline: Set the title, tagline, favicon and start button.
- Show more button: Use “more” button or infinitely loading.
- Style: Allow you to switch between Default and Flat style, select primary color, header background and pick fonts for the theme.
- Color: Color of the header text
- Header Mask: Allow you to show or hide the header mask and pick the color of the header mask. ( Available in Default style only ).
- Main Pagination: Enable/Disable the Date-Pagination.
- Header Image: Custom your own header image.
- Menus: Custom and choose your Menu.
- Next Post: Show / Hide the next post at the bottom of each the single post page.
- Gallery: Enable/disable the gallery lightbox.
- Nav: Let you to set the Primary menu to show or hide and switch the menu between the text and the icon.
- Post form: Allow you to enable/disable front-end post form.
- Static Front Page: Select the page as Homepage.
- Custom Code: Add custom code.
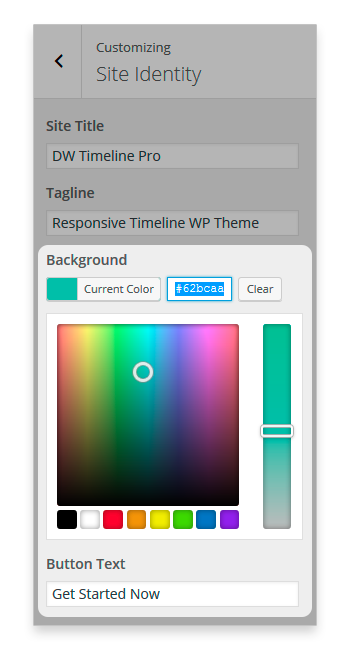
Site Title & Start Button
DW Timeline Pro gives you the options to display Site Title, Tagline and upload the Favicon and Start Button. Easy to do this by navigating to Appearance >> Customize >> open up the Site Title & Tagline tab.
1. Site Title & Tagline Settings
- Go to Appearance >> Customize >> Site Title & Tagline
- Enter your site title & tagline
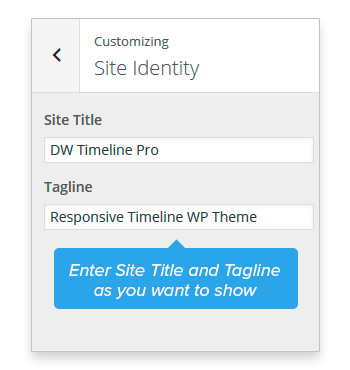
The following screenshot will show the Site Tile & Tagline:
2. Favicon Settings
- To display the favicon, select Site Favicon under Site Title & Tagline section.
- Upload a favicon image.

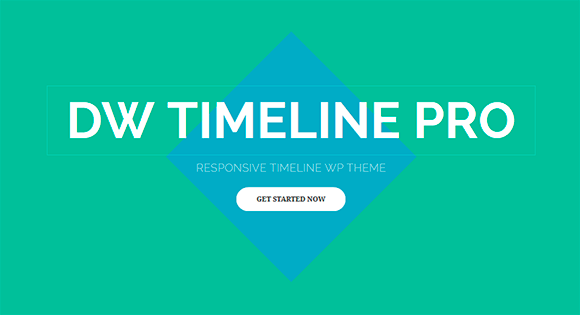
3. Header Button Text and Background
This is how it should look like in front-end:
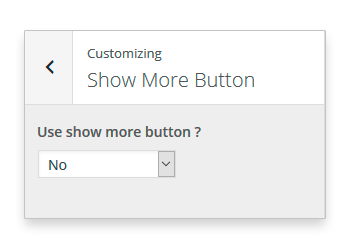
Show More Button
DW Timeline Pro lets you switch between infinite loading and “Show More” button by navigating to Dashboard >> Appearance >>Customize >> Show More Button.
Infinite scrolling: Load the next set of posts automatically without clicking on a link.
Show More button: Click on ” More” button at the end of each page to display more pages.
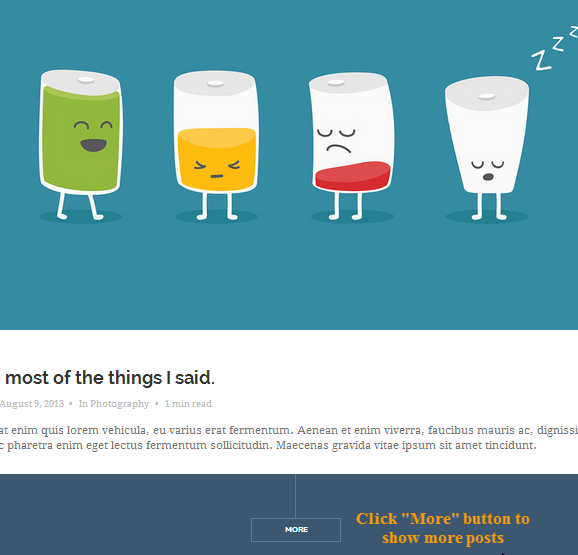
Here is how the “More” button should look like in front-end:
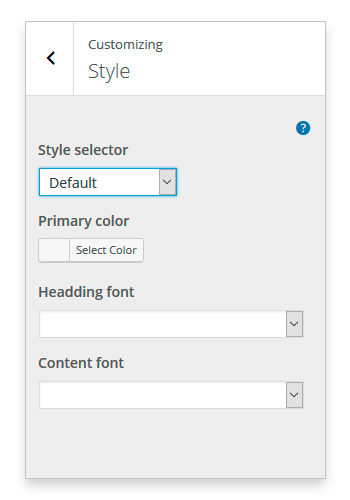
Style Settings
This section allows your to switch between default layout and flat layout easily. Just go to Dashboard >> Appearance >> Customize >> Style Selector tab and select the style you want to apply for your site.
- Default Style: This style will look like the style of the free WordPress DW Timeline.
- Flat Style: A flat design with colorful and clean style.
1. Default Style
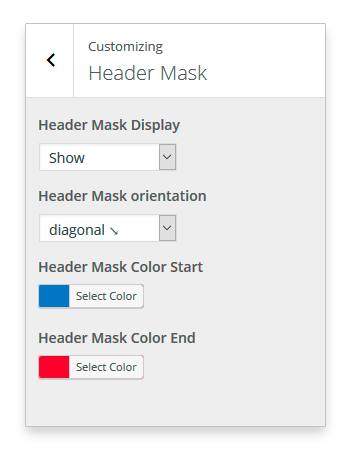
Default Style of the DW Timeline Pro comes with two sections: Header Image and Header Mask. When you select style as Default, the Header Image and Header Mask section will be shown automatically.
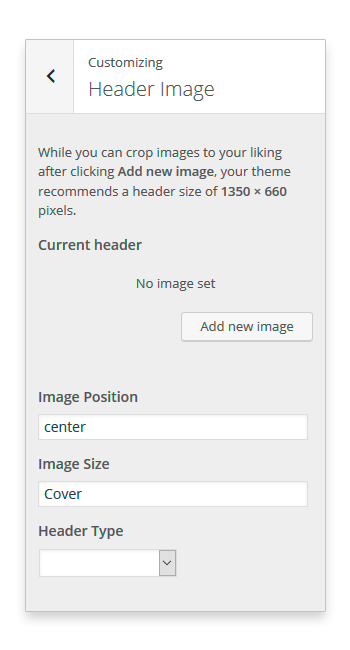
- Header Mask: Allow you to upload multi header images and adjust the image position as well as image size as you wish.
Multi header image mean that it can automatically change the header image from the gallery you provide and switch it each time the page refresh. That will make the web site look like it always fresh and new. More over, when upload the header image, the theme provide crop function so you can easily control the header image size.
Note that the DW Time Pro has up to various positions for the header image such as center, left and right. Just enter the position you prefer in the textbox of the image position.
Please go to the following link for further information:
http://www.w3schools.com/cssref/playit.asp?filename=playcss_background-position
Regarding the image size, you can set the width and the height of the image in percent. The first value sets the width and the second value is the height. In case there is only one value given, the second value is set to “auto”. If you would not like to show up the image size in percent, you can fill the value “cover” into the textbox so that the background area is completely covered by the image.
For further information about the image size, please check here:
http://www.w3schools.com/cssref/playit.asp?filename=playcss_background-size&preval=auto
The header type can be fixed, that will make special effect to the header image.
- Header Mask: Give you the option to show or hide the Header Mask, and pick color for the Header Mask.
Front-end Appearance :

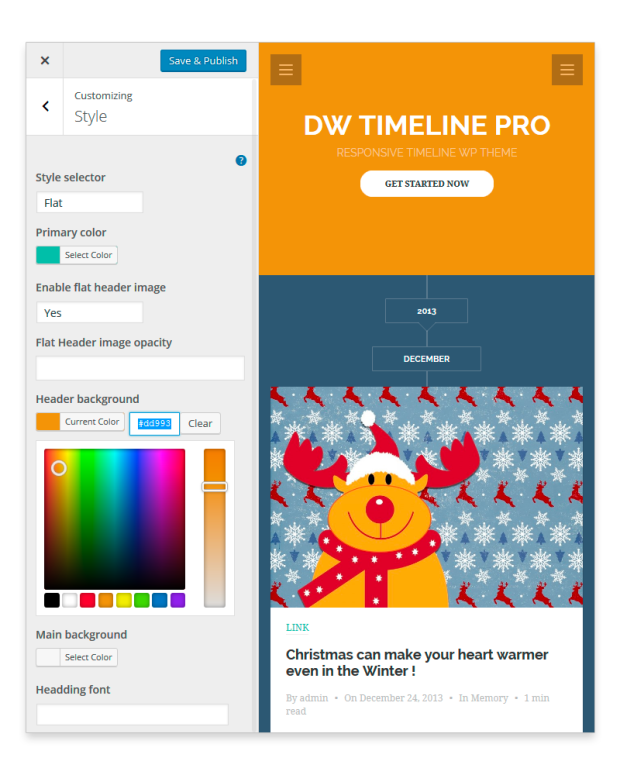
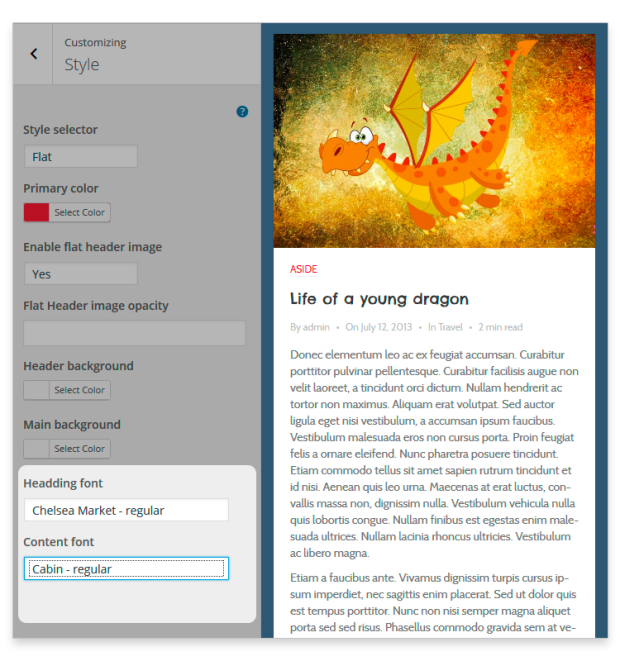
2. Flat Style
When Flat Style is selected, you can change header background and main background for this style.
Primary Color
Primary Color allows you to pick a color for the text link according to your taste. You can choose a color scheme from Admin Panel >> Appearance >> Customize >> Style >> Primary Color.
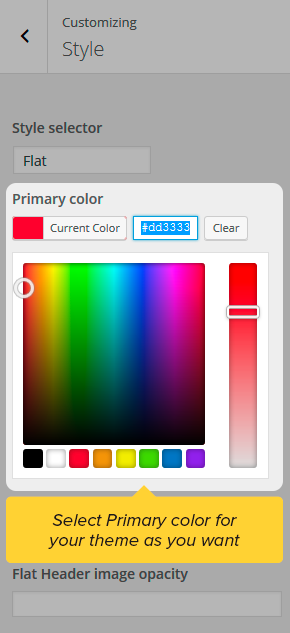
After selecting the color, you can see the result:
Font Settings
This section is a simple and quick way to select Google fonts for your title, body content of the articles without touching code. The section is integrated in Style tab, and to do this, go to Dashboard >> Appearance >> Customize >> Style >> Heading font & Content font.
If you want to use the default font, just leave the box blank.
Main Pagination
Main Pagination can switch your pagination from default to the date pagination. That mean your posts will be load and arrange like a timeline with a pagination by month and year.
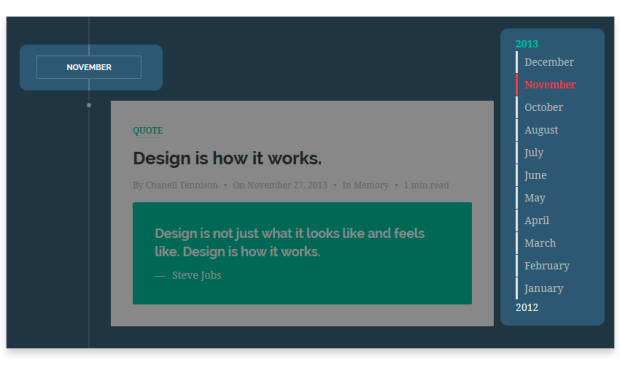
(*) The Date Pagination support all language from WordPress core.
Categories
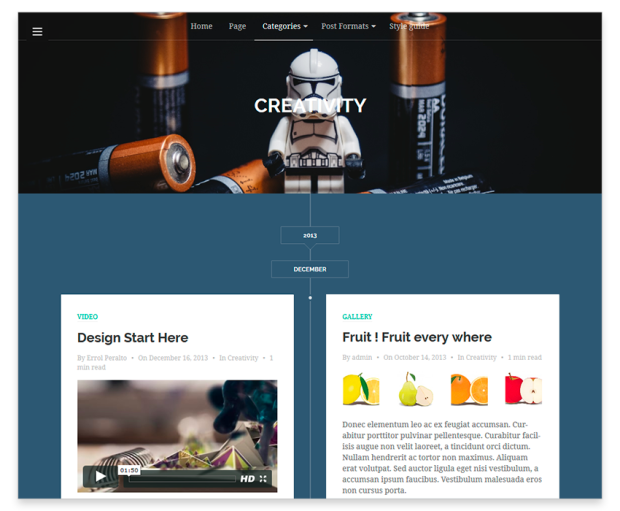
In DW Timeline Pro theme, each category can have an unique header image representing for them.
To set the picture for the category, you can create or change it by go to Dashboard >> Post >> Categories
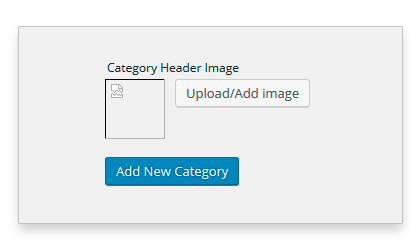
(*)Note: For the flat style of DW Timeline Pro, you have to Enable flat header image
After the set up, you category should look like this:
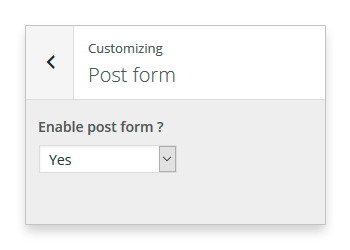
Front-end Post Format
You can easily disable/enable the front-end post format form with just one click in Customize >> Post Form.
Post Settings
This function is available in the post editor screen. Start by navigating to Dashboard >> Posts >> Add New/ Edit, find Post Settings Pane on the right-hand site. On the Post Settings pane, you can configure grid and background color for the post easily.
There are the settings of the Post Settings pane:
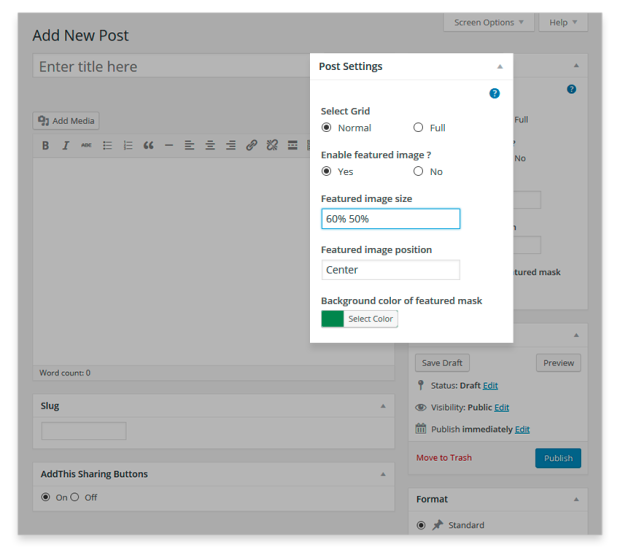
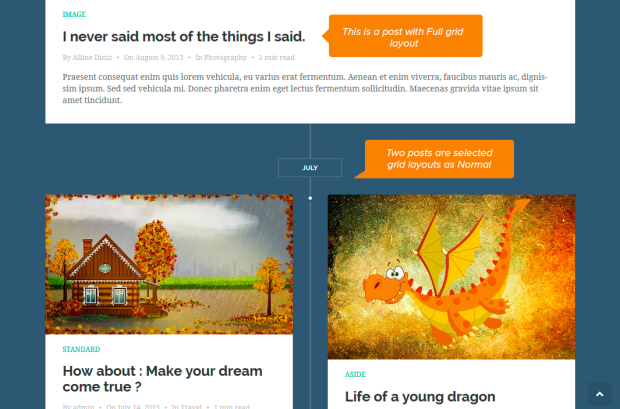
1. Grid Layout
There are two default grid layouts which you can apply for the each post: Normal and Full grid layout. Simply check the box next to the gird layout which you want to show.
Lets take a look at what grid layout of the post displays in front-end:
2. Background Color of Featured Mask
Background color will be shown as a mask of the featured image if that post has the featured image.

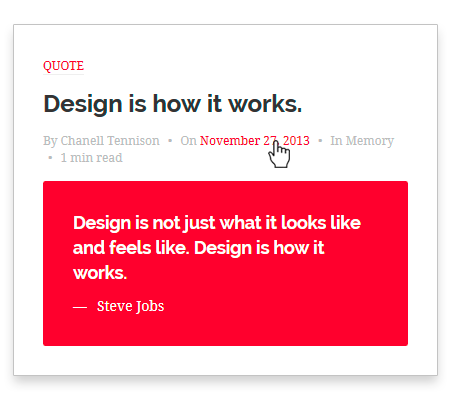
This is how it should look like in front-end:

3. Image Size and Image Position
Image Size: You can set the height and the width of the featured image of the post in percent. There are two values: the first value is the width and the second valued sets the height. If you give only one value, the second value is set to “auto. In case you would like to display a cover image, simply type “cover” in the textbox.
If you want to learn more about image size, please check here: http://www.w3schools.com/cssref/playit.asp?filename=playcss_background-size&preval=auto
Image Position: you can fill the following positions for the featured image: center, left, right.
Confused? Please check here for further information:
http://www.w3schools.com/cssref/playit.asp?filename=playcss_background-position
Page Settings
Page settings pane lets you the options to configure the featured image. To do this, simply navigate to Dasboard >> Pages >> Add New or pick any page to edit, this will take us to an editor screen of the page, look at the Page Settings pane on the right hand side and customize as you prefer.
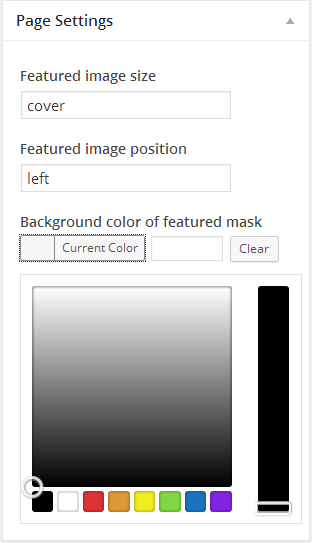
The page settings are similar to the post settings. There are many positions for the featured image of the page: center, left and right, etc. Simply type the position in the textbox of the image position and save all changes.
Would you like to learn more information? Please check here:
http://www.w3schools.com/cssref/playit.asp?filename=playcss_background-position
Of course, you can set the width and the height for the featured image of the page in percent. By defautl, the first value is the width and the second value is the height. If you enter only one value, the second value is set to “auto”.
You want the background image will cover the background area, simply enter “cover” and update the settings as shown in the screenshot above.
For further info, please go to the link below:
http://www.w3schools.com/cssref/playit.asp?filename=playcss_background-size&preval=auto
Here is how it should look like in front end:

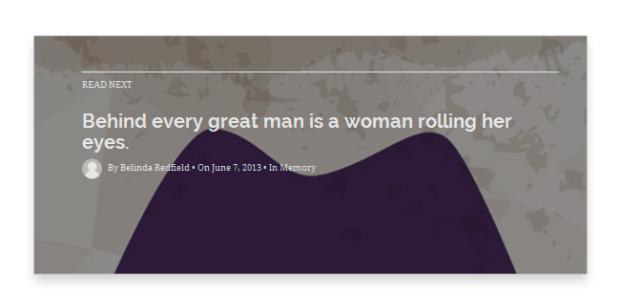
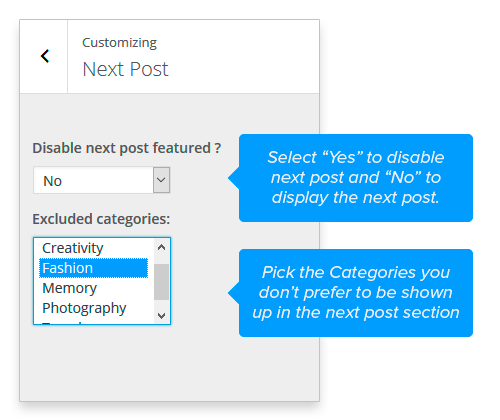
Next Post Settings
Would you like to display the next post at the bottom of each single post page? If yes, this section is here for you. By logging in to the Admin Panel >> Appearance >> Customize >> Next Post tab brings you to the settings interface illustrated below:
Here is how it looks like in front-end: