DW Brickstore: Homepage Layout 1
IMPORTANT NOTE 1:
This guide is used to guide step-by-step how to configure out the homepage to look like our demo site.
IMPORTANT NOTE 2:
DW Brickstore supported the page builder to build the landing homepage flexibly according to your taste. However, we strongly recommend that you should build your own site as instructed in our guide. Other page builder styles can make your site broken layout.
IMPORTANT NOTE 3:
The homepage is built by using the following plugins: Page Builder by SiteOrigin, SiteOrigin Widgets Bundle, Revolution Slider, Unyson, WooCommerce, Woocommerce Monster Widget, YITH Woocommerce Compare, YITH WooCommerce Quick View, YITH WooCommerce Wishlist and Contact Form 7. Therefore, please install and activate them before configuring out the homepage layout like our demo.
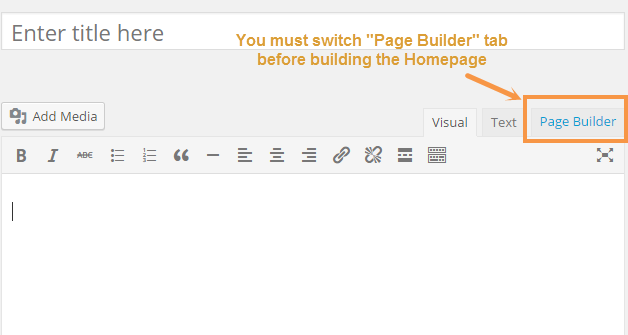
IMPORTANT NOTE 4:
To build all homepage layout properly like our guide, make sure that you switch your editor area into Page Builder.
Step 1 Go to Dashboard >> Pages >> Add New
Step 2 Input a title for your homepage.
Step 3 Switch Page Builder tab above the editor area
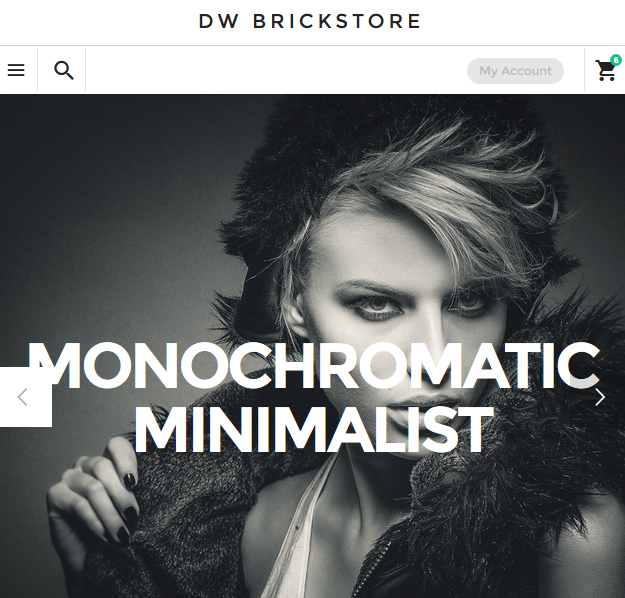
1. Revolution Slider
This section requires the Page Builder by SiteOrigin and Revolution Slider plugins and you have already created the revolution slider first.
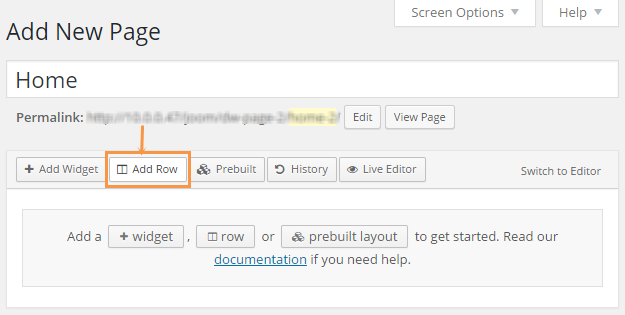
Step 1 Go to Dashboard >> Pages >> Home 1, make sure that you selected the Page Builder tab
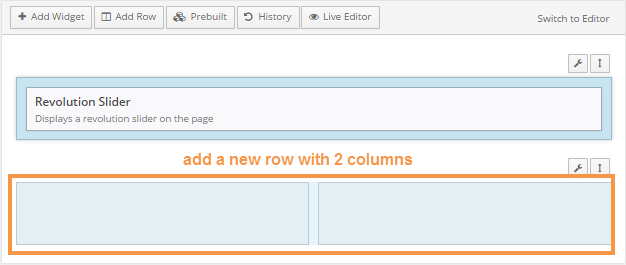
Step 2 Add a new row to the page.
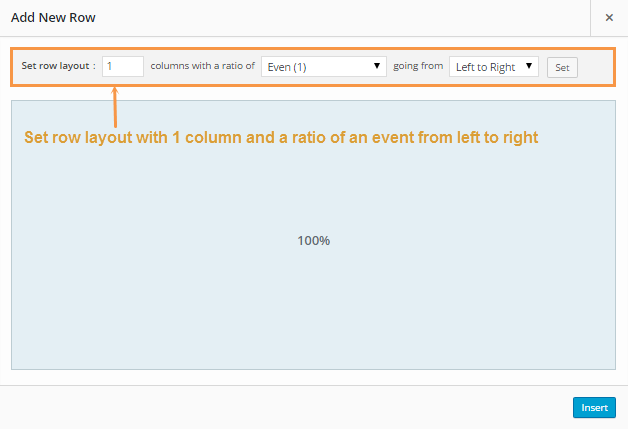
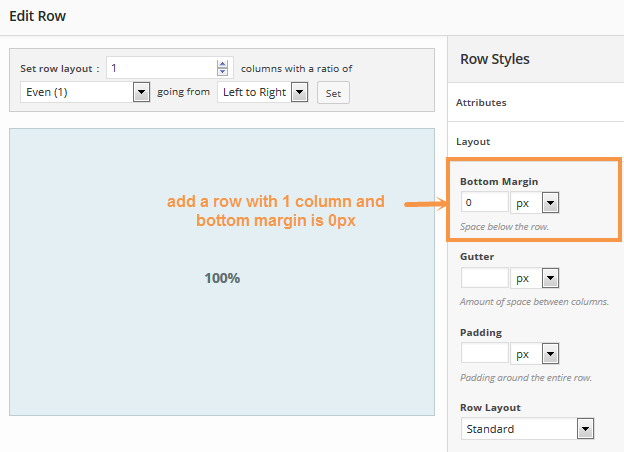
Step 3 Set the row layout
After clicking on “Add Row” button, an “Add New Row” dialog will be displayed. Selecting the number of cells in the row is 1 cell-layout with an even ratio from left to right. Press “Insert” button to finish.
Step 4 Set Layout for the row
Click on the spanner icon in the top right corner above that row to start editing.
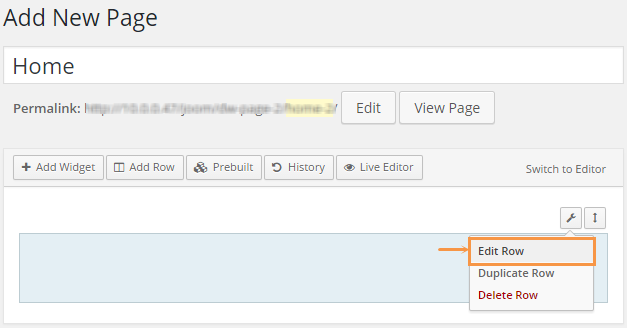
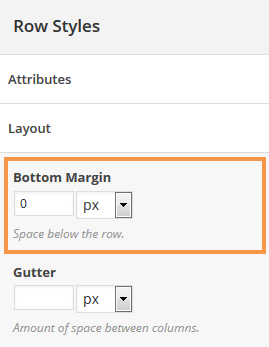
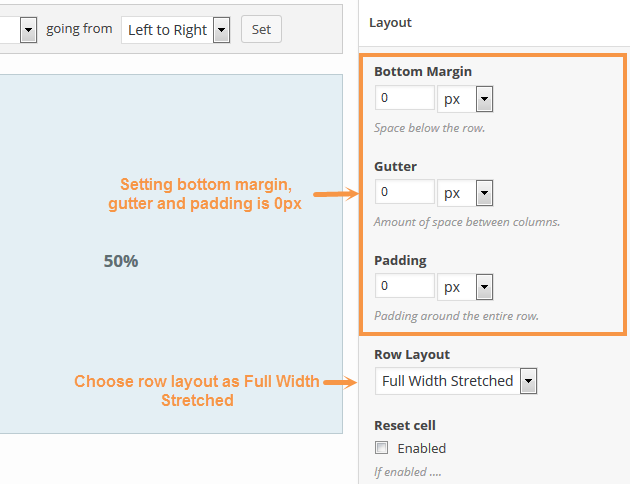
The “Edit Row” dialog will appear, find the Row Styles Sidebar >> Layout . Bottom margin is 0px as shown below:
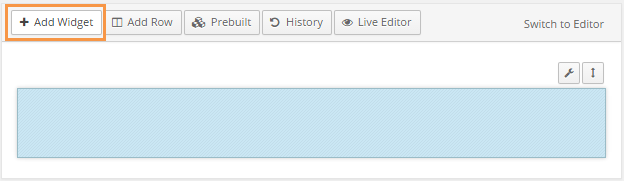
Step 5 Insert Revolution Slider widget to the row
To add a widget, first activate the row to which you wish to add the widget. Then click on “+ Add Widget.”
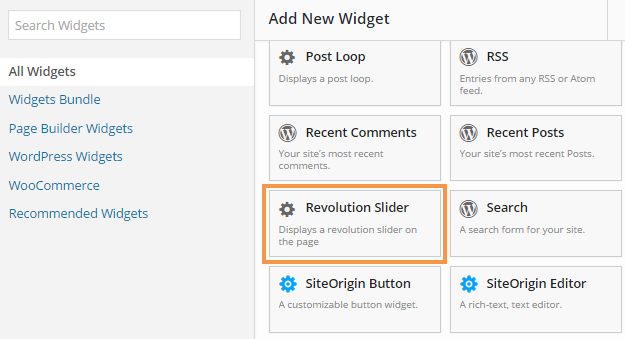
Look for the Revolution Slider widget and add it to the row
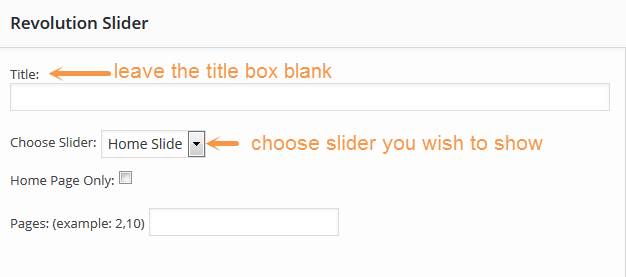
Once done, start configuring out according to your taste
The screenshot below is the front-end of the home section:
2. Images Section
This section needs the following widgets: Layout Builder – the widget of the Page Builder by SiteOrigin plugin and DW Brickstore: Blurb – developed by DesignWall team to show content and image with new style.
Step 1 Navigate to Dashboard >> Pages >> Home 1
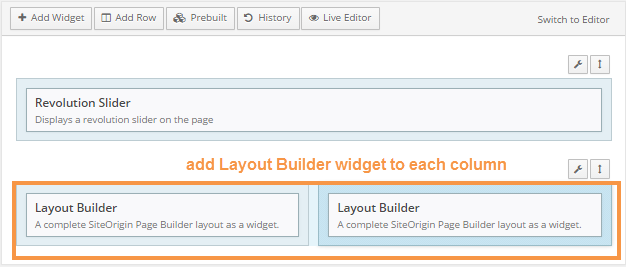
Step 2 Add a row with 2 columns under the Revolution Slider
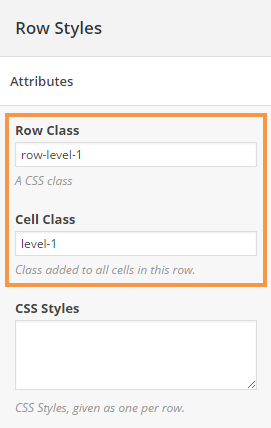
Step 3 Set Layout for the row by clicking on “Edit Row” link. Once clicked, the “Edit Row” dialog will appear, find the Row Styles sidebar >> Attributes, add the code below to
Row Class
row-level-1
Cell Class
level-1
Afterward, switch into Row Styles Sidebar >> Layout under the Attributes tab. Set layout as shown below:
Step 4 Add Layout Builder widget to each column of the row
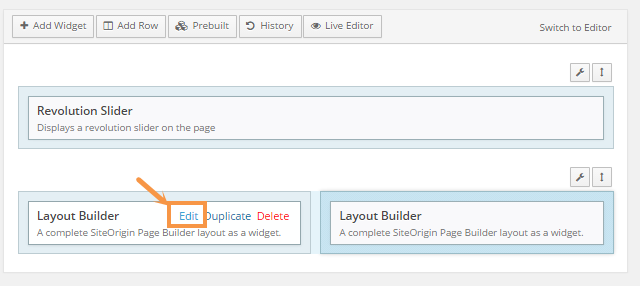
Step 5 Add DW Brickstore: Blurb widget
Hover over the Layout Builder widget to see functions, click on ” Edit” link
Add two 1-cell layout rows to the Layout Builder widget
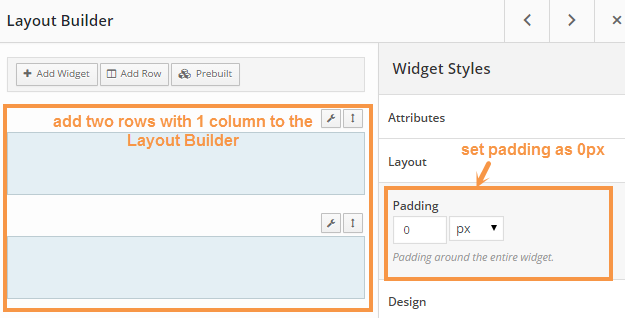
In each row, add DW Brickstore: Blurb widget
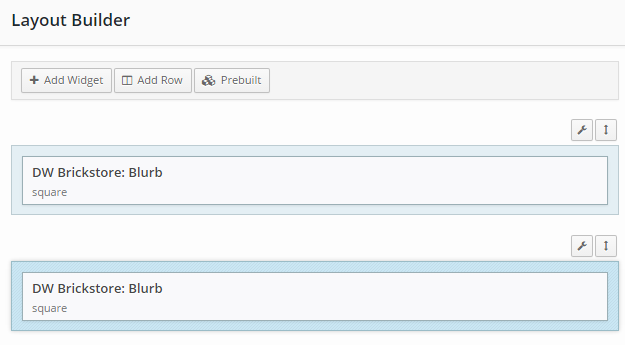
Once you added the DW Brickstore: Blurb widget, start configuring out the widget.
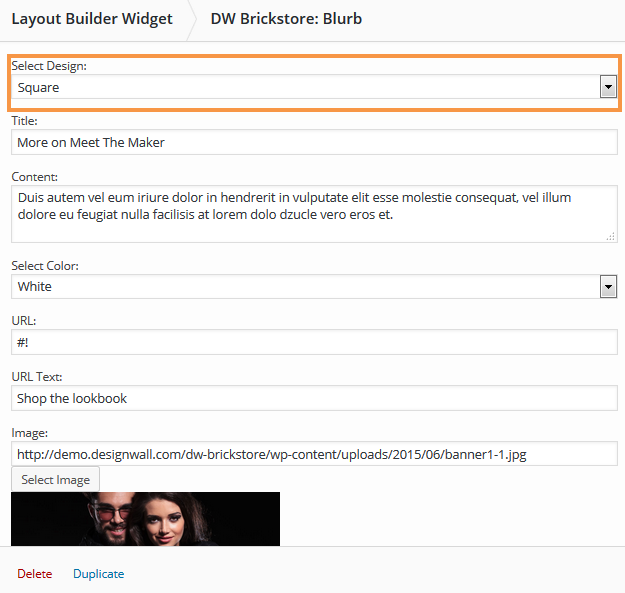
IMPORTANT NOTE 1: Each DW Brickstore: Blurb widget, you must select Design. There are 3 designs to choose from: Square, rectangle right and rectangle left.
IMPORTANT NOTE 2: The recommended size of the images for this section is 1000px x 1000px.
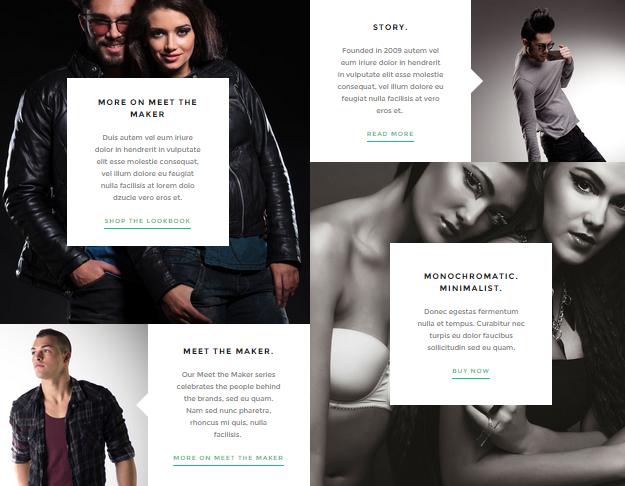
Front-end Appearance
3. Products List
DW Brickstore offers to show the products in grid style by using DW Bristore: Products Grid widget. However, before adding the DW Brickstore: Products Grid widget to, you must install WooCommerce plugin first.
Step 1 Go to Dashboard >> Pages >>Home 1
Step 2 Add a new row with 1 column
Step 3 Set row layout with bottom margin as 0px
Step 4 Add DW Brickstore : Products Grid

Step 5 Configure the DW Brickstore: Products Grid
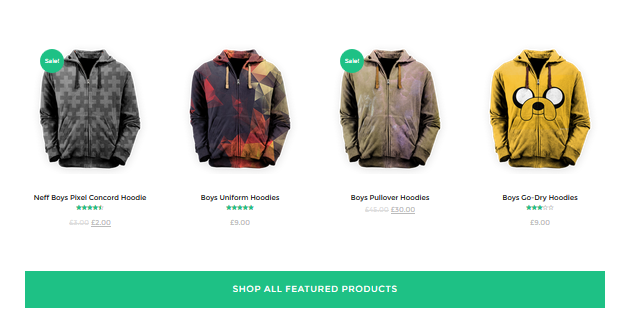
Front-end appearance
4. Banner Section
Step 1 Located Dashboard >> Pages >> Home 1
Step 2 Add a new row with 1 column
Step 3 Set layout. This step will protect the layout of your site from breaking and look cool. Find the Layout section inside the Row Styles from the right side, make sure that the value of bottom margin, gutter and padding is set to 0px.
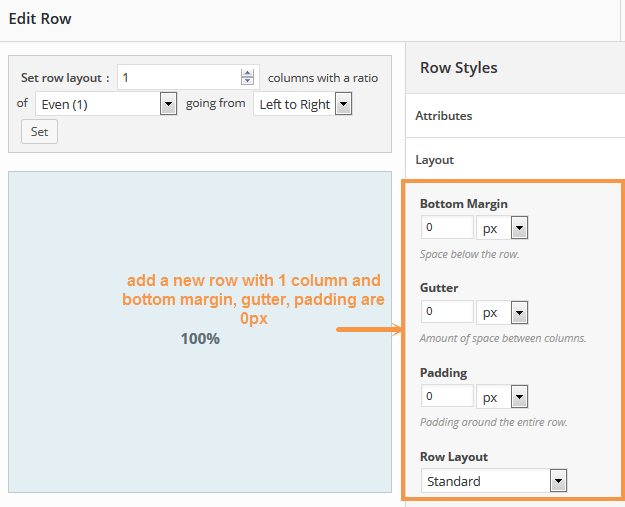
Step 4 Add DW Brickstore: Blurb 2
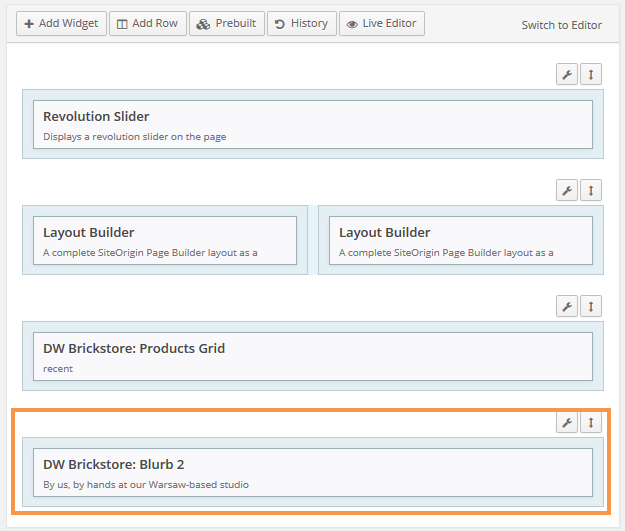
Step 5 Configure the DW Brickstore: Blurb 2 widget
IMPORTANT NOTE: The recommended size of the image for the DW Brickstore: Blurb 2 widget is 1920 × 500px.
Frontend Appearance